
Next.js13のプロジェクトにJestを導入する手順です。
Next.jsの公式サイトを参考にしています(というかほぼ公式サイトそのままです)
目次
Jestのインストール
下記コマンドを実行してJestをインストールします。
npm install --save-dev jest ts-node
OR
yarn add --dev jest ts-node
Jestの設定ファイルを作成
ルートディレクトリ(package.jsonがあるディレクトリ)にjest.config.tsを作成します。
const nextJest = require('next/jest')
const createJestConfig = nextJest({ // Provide the path to your Next.js app to load next.config.js and .env files in your test environment dir: './',
})
// Add any custom config to be passed to Jest
/** @type {import('jest').Config} */
const customJestConfig = { // Add more setup options before each test is run // setupFilesAfterEnv: ['<rootDir>/jest.setup.js'], // if using TypeScript with a baseUrl set to the root directory then you need the below for alias' to work moduleDirectories: ['node_modules', '<rootDir>/'], // If you're using [Module Path Aliases](https://nextjs.org/docs/advanced-features/module-path-aliases), // you will have to add the moduleNameMapper in order for jest to resolve your absolute paths. // The paths have to be matching with the paths option within the compilerOptions in the tsconfig.json // For example: moduleNameMapper: { '@/(.*)$': '<rootDir>/src/$1', }, testEnvironment: 'jest-environment-jsdom',
}
// createJestConfig is exported this way to ensure that next/jest can load the Next.js config which is async
module.exports = createJestConfig(customJestConfig)
もし「Parsing error: Cannot find module ‘next/babel’」というエラーが表示されたら、.eslintrcに下記のように”next/babel”を追記してください。
{ "extends": ["next/core-web-vitals", "next/babel"]
}
package.jsonにスクリプトを追加
package.jsonにスクリプトを追加します。
"scripts": { "dev": "next dev", "build": "next build", "start": "next start", "lint": "next lint", "test": "jest" },これで、下記のようにしてテストを実行できるようになります。
npm run test
OR
yarn test
テスト対象の関数を作成
テストをしたい関数を作成します。
src配下にfunctionsディレクトリを作成し、hoge.tsを作成して関数hogeを定義します。
引数で受け取った数値を2倍して返す単純な関数です。
export const hoge = (x: number): number => { return x * 2;
};
テストコードを置くディレクトリとテストコード作成
src配下に__tests__ディレクトリを作成し、このディレクトリ配下にテストコードを置くようにします。
import { hoge } from "@/functions/hoge";
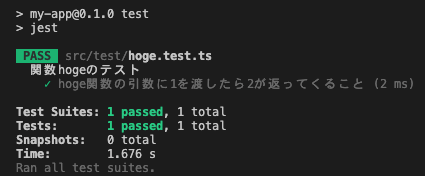
describe("関数hogeのテスト", () => { test("hoge関数の引数に1を渡したら2が返ってくること", () => { expect(hoge(1)).toBe(2); });
});この状態でnpm run test もしくは yarn testを実行するとテストが実行されます!
ちなみに、npm run test、yarn testをすると全てのテストが実行されますが、npm run test hoge.test.js、yarn test hoge.test.jsのようにファイル名を指定すると、指定したファイルのテストのみ実行されます。
エラーが発生した場合
Error: Jest: Failed to parse the TypeScript config file /Users/tomokiohara/Develop/nextjs/my-app/jest.config.ts
Error: Jest: 'ts-node' is required for the TypeScript configuration files. Make sure it is installedもしテストを実行して上記のようなエラーが発生した場合は、ts-nodeをインストールする。
npm install ts-node
OR
yarn add ts-node
IT技術ブログ
↓↓「にほんブログ村」のランキングに参加しています。少しでも面白い、参考になったとか思われたらポチッとしていただけると嬉しいです!
